
Your golf shirt is draped over the laundry basket, there's a sunscreen mark beside the chest graphic, and your cap has a pale sweat line around the brim. You could throw everything into the next load, but you'd rather not turn the team joke into a cracked, faded patch.
Care for the graphic and the fabric together. Funny custom golf shirts can combine stretchy performance material with printed artwork that needs gentler handling than the shirt itself. The safest routine protects whichever part is least tolerant of heat, friction, or soaking.
Care Settings for Every Golf Shirt and Hat Fabric
| Item | Water and cycle | Drying | Iron or heat | Stain or odor note |
|---|---|---|---|---|
| Cool-Stretch printed golf shirt | Cold, gentle cycle | Tumble low if permitted, or hang dry | Inside out, never over graphics | Pre-treat sweat lines before washing |
| Cotton or cotton-blend polo | Cold; use warmer water only if the label permits | Hang dry or tumble low | Reverse side, at the label's setting | Enzyme detergent for sweat yellowing |
| Heavy print or raised graphic shirt | Cold, hand wash or mesh bag if permitted | Dry flat | No direct heat | Spot-treat stains gently; don't scrub artwork |
| Wool or wool-blend cap | Cool water, wool-safe soap, hand wash if permitted | Reshape on a towel and air dry | No heat | Dab stains, never scrub |
| Performance hat with stiffened visor | Cool damp cleaning; hand wash only if permitted, no soaking | Air dry on a form, visor supported | No heat | Wipe sweatband with diluted mild detergent |
| Leather trim or brim detail | Damp cloth only | Air dry away from sun | Never iron | Use a compatible leather conditioner sparingly |
Start with your printed performance polo. Cold water and gentle handling are conservative choices for stretch fabric and applied artwork. Understanding how moisture-wicking fabric works also helps explain why a clean, thoroughly rinsed shirt matters more than a heavily fragranced one.
Cotton polos can tolerate different care settings, but the print may still require cold washing. A cotton body doesn't make its graphic heat-safe. If ironing is permitted, work on the reverse and stay clear of the artwork, including its underside.
Caps need a separate decision. Wool can change shape with agitation, while structured hats may contain stiffeners or brim materials that shouldn't be saturated. Leather details make damp cleaning a safer starting point than immersion.
Label first: When the garment's instructions conflict with a general care table, follow the garment's instructions.
Before starting, check the fiber label, print condition, and any separate hat-care instructions. A dry-clean-only label overrides a washable-looking fabric.
How to Pre-Treat Stains and Sweat Lines First
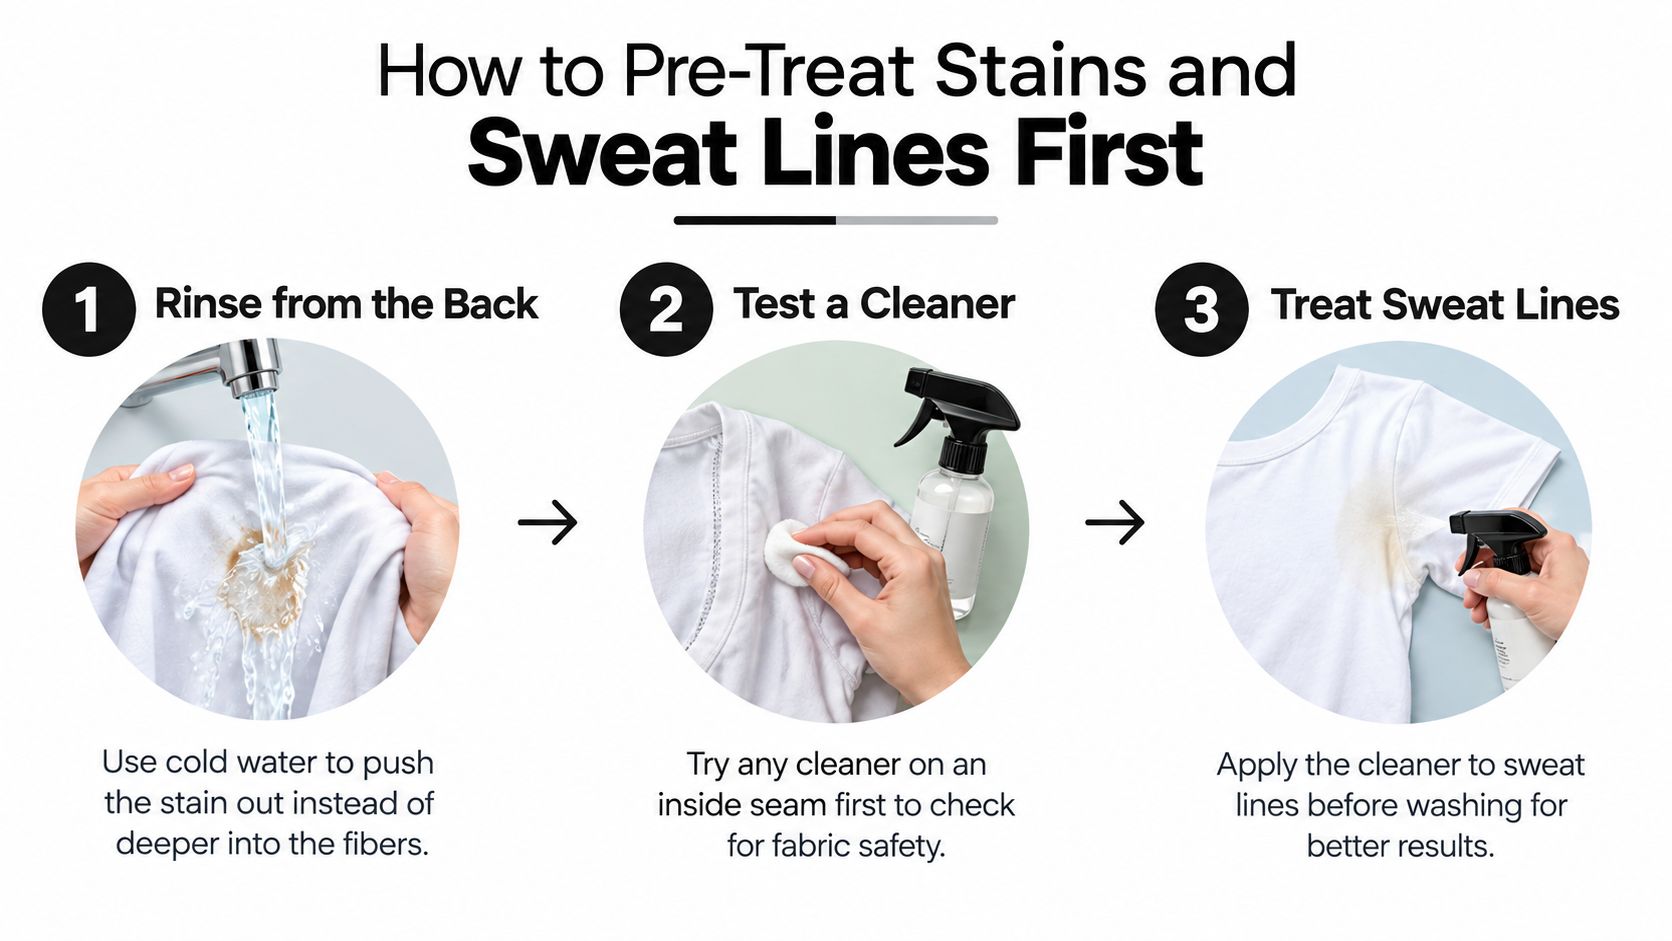
Treat the stain where it sits, rather than making the entire garment endure a harsher wash. Put a clean white towel behind the affected area so loosened soil doesn't spread onto another panel.
- Rinse from the back. For washable shirts, run cold water through the reverse of the stain. This helps move loose soil outward instead of driving it farther into the fabric.
- Test the cleaner. Apply a little diluted detergent to an inconspicuous seam. Rinse and check for color change, tackiness, or a visible ring before treating the front.
- Work on sweat lines. Apply liquid laundry detergent to the underarm fabric, following its pretreatment directions. An enzyme detergent is useful for washable synthetic or cotton shirts, but don't use it indiscriminately on wool or leather.
- For grass and clay, lift off loose debris first. Massage detergent into the fabric with your fingertips; reserve a soft brush for unprinted, sturdy areas.
- Treat sunscreen and oily marks gently. Use liquid laundry detergent or a small dab of plain dishwashing liquid on a tested area. Rinse dish soap thoroughly before machine washing so it doesn't create excessive suds.
- On a hat, dab marks with a barely damp white cloth and mild soap. Don't flood the visor, and don't chase stubborn dye marks with solvent.
- Inspect before drying. Check the damp garment in good light. Repeat an appropriate treatment if the mark remains.
Keep Stain Removal Local
Yellow underarm marks can involve body oils, perspiration, and product residue. Don't assume bleach is the answer, particularly when a white shirt carries colored artwork.
If your post-round cleanup includes blankets from the cart or clubhouse, That Blanket Co.’s guidance on how to treat stains on fleece and sherpa addresses those different surfaces. Don't transfer a brushing technique from a sturdy polo to a textured blanket without checking its care requirements.
Keep a stained shirt out of the dryer until you're satisfied with the treatment.
Hand Washing or Machine Washing Your Golf Gear
| Factor | Hand wash | Machine wash on gentle |
|---|---|---|
| Print and graphic wear | Less friction when handled gently | More contact unless protected inside out in a mesh bag |
| Sweat odor removal | Allows targeted cleaning and thorough rinsing | Suitable for routine washable polos |
| Hands-on time per item | More attention for washing and rinsing | Less handling, but requires sorting and preparation |
| Best for | Washable hats, delicate graphics, initial assessment of unfamiliar prints | Routine polos and washable cotton blends |
| Avoid in both | Hot water, wringing, aggressive scrubbing | Unapproved bleach, softener, and excessive drying heat |
Hand washing suits an unfamiliar custom print when you want to watch for bleeding or lifting edges. Gentle machine washing suits an established, label-approved polo that needs ordinary post-round cleaning. Neither method makes an unsuitable garment washable.
Use a Basin for Delicate Work
Fill a clean basin with cool water and dissolve a small amount of mild detergent before adding the shirt. Move the garment through the water gently, paying attention to the collar and underarms without rubbing printed faces together.
Keep any soaking brief and label-approved. Rinse until the water runs clear and the fabric no longer feels slippery, then press out moisture with a towel. Don't twist a stretchy shirt or wring a cap.
Leather-adjacent details need extra caution. Clean them locally unless the manufacturer explicitly allows immersion.
Prepare a Machine Load Properly
Turn shirts inside out, close zippers, and use a roomy mesh bag. Wash with similar colors and lightweight garments, not towels, jeans, or equipment covered in hook-and-loop fasteners.
Measure detergent for the actual load size and water conditions. More detergent isn't better cleaning if the machine can't rinse it away. Skip fabric softener on performance shirts, and avoid bleach on printed areas unless the manufacturer explicitly approves it.
For a dry-clean-only garment or mixed-material piece you can't identify, consult a professional before experimenting. Tumble Laundry dry cleaning services is one option for discussing specialist cleaning; tell the cleaner about the graphic, trim, and stain rather than requesting dry cleaning by default.
Graphics shouldn't rub against exposed zippers, hook-and-loop fasteners, or other printed surfaces in the drum.
Test a New Custom Print Before the First Full Wash
A shirt can look excellent straight out of its packaging and still react poorly to washing or rubbing. Check the print before committing a group order to a shared care routine.
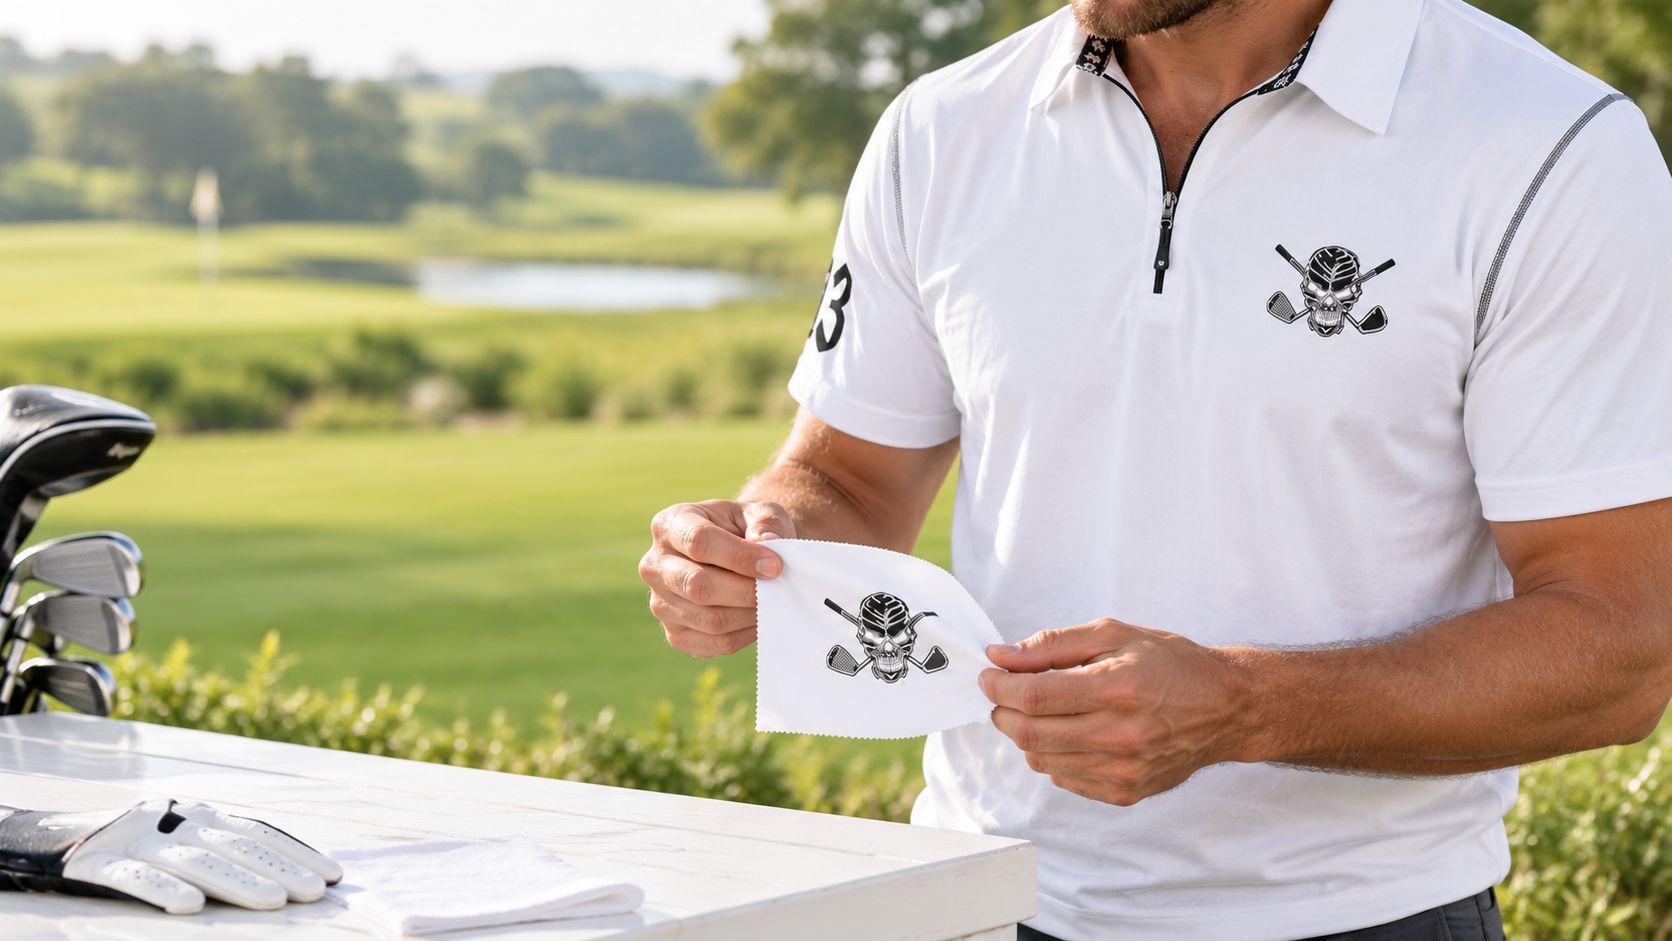
The Lucky 13 Hybrid Zipper Cool-Stretch Golf Shirt (White) is an example of a stretch performance shirt with a distinct chest graphic. Its listed care instructions specify cold gentle washing, low tumble drying or hanging, no bleach, and no ironing directly over the graphics.
For an unfamiliar custom shirt, use this conservative screening routine:
- Photograph it before washing. Capture the artwork, edges, seams, and overall shirt shape under consistent lighting.
- Test diluted detergent on a concealed printed area, if one exists. An unprinted inside hem can reveal fabric bleeding, but it can't tell you whether the chest artwork is durable.
- Check for transfer. Gently rub a concealed artwork edge with a clean white cloth, then inspect the cloth. Repeat cautiously with a damp cloth, stopping if ink transfers or the surface becomes tacky.
- Wash according to the label and air dry. Compare the result with your photographs for dulling, bleeding, lifting edges, or distortion.
- Gently extend the fabric within its normal wearing stretch. Don't pull hard to manufacture a failure. Watch whether the graphic flexes with the shirt or separates at its edges.
Treat This as Screening, Not Certification
Perfectos' textile testing guidance distinguishes laundering performance from rubbing fastness and dimensional change. A successful wash doesn't establish resistance to golf-bag straps, cart seats, or repeated cleaning.
For detailed artwork, such as the motifs discussed in this skull golf shirt design guide, photograph fine lines as well as large filled areas. If you see early deterioration, stop testing and contact the supplier with the care method and photos.
How to Dry Shirts and Reshape Hats Without Ruining Them
Start with the hat while it's still damp. A misshapen crown is easier to support before it dries than to correct afterward.
- Blot with a towel. Press gently against the crown and sweatband. Don't twist the cap or squeeze the brim.
- Reshape the crown with your hands, smoothing panels without pulling on embroidery.
- Support the inside. Use a hat form or a clean rolled towel that fills the crown without stretching the sweatband.
- Support the visor in its existing curve. Don't force a wet brim into a sharply different shape.
- Leave it in moving indoor air. Keep it away from radiators, hair dryers, and hot car dashboards. Wait until the sweatband and internal supports are fully dry before wearing or storing it.
Don't balance a wet structured cap on its brim and expect it to retain its shape. Support the crown and visor separately so the wet fabric doesn't pull the cap out of alignment. When choosing a replacement, examine construction as well as ventilation; this guide to performance golf hats provides useful selection context.
Hang Lightweight Shirts and Lay Heavy Graphics Flat
A lightweight polo can air dry on a broad, smooth hanger if its label permits. Straighten the collar, align the shoulder seams, and avoid clipping clothespins onto visible fabric.
Lay a shirt flat when wet weight pulls at the shoulders or when a substantial graphic makes one area heavier. Place it on a clean towel, smooth it into its natural shape, and change the towel if it stays saturated. Don't fold a wet printed face against itself.
If tumble drying is permitted, use the lowest approved setting and remove the shirt promptly. Let it finish drying in air rather than leaving it compressed in a warm drum.
Dry to the garment's condition, not a guessed timetable. A cap's sweatband or a shirt's thick collar can remain damp after the visible surface feels dry.
Deodorizing Gear and Avoiding Costly Mistakes
Perspiration, skin oils, and microbial activity contribute to odor. A performance finish may help manage smell during wear, but it doesn't remove the soil left in a collar or underarm. Clean those areas rather than masking them with fragrance.
Make These Habits Automatic
- Unpack immediately. Take shirts and hats out of the golf bag when you get home. Open the bag's clothing compartment and let it dry too.
- Use detergent before additives. If a washed shirt still smells, check detergent dosing, load size, and rinsing before adding baking soda or a deodorizing product. Follow any additive's label and confirm compatibility with the garment.
- Clean the sweatband locally. Wipe it with a cloth dampened with diluted mild detergent, then remove residue with a clean damp cloth. Don't routinely apply vinegar to unknown dyes, metal fittings, leather, or stiffeners.
- Rotate fully dry gear. Keep a clean shirt and dry cap ready so you aren't repacking damp items before your next round.
A spoonful of powder inside a bag isn't a substitute for removing a forgotten wet towel. Empty pockets, inspect lining seams, and clean the bag according to its own instructions.
Odor check: Smell the garment only after it's fully dry. Fragranced detergent can hide a problem while the fabric is wet.
Avoid Fixes That Create Another Problem
Don't raise the wash temperature just because a synthetic shirt smells. Treat the soiled areas and use an appropriate detergent first, within the care label's limits.
Avoid spraying perfume or concentrated deodorizer onto a chest graphic. These products can leave residues, and you may not know how their solvents will affect an applied print.
Bleach also deserves caution on a white polo with colored artwork. The base fabric and the graphic aren't the same material. White fabric is not permission to bleach the whole shirt.
Finally, don't leave dirty gear in a hot car. Bring it indoors, separate the damp items, and give yourself a clean starting point for the next wash.
Build a Post-Round Routine That Keeps Gear Fresh
A workable care routine needs a place for dirty gear, a place to dry it, and a clear decision about what needs washing. You don't need a shelf of specialist products. A mild detergent, white cloths, mesh wash bag, absorbent towel, and suitable hat support handle most routine jobs.
After Each Round
Inspect your shirt before putting it in the laundry. Treat fresh marks, empty pockets, and separate it from damp gloves or towels. Put your cap somewhere the sweatband can dry without crushing the crown.
Wash heavily soiled clothing promptly rather than leaving it damp until laundry day. If an item must wait, let it air first.
At the Weekly Laundry Check
Sort the washable rotation by care requirements, not merely by color. Keep delicate graphics away from rough garments, and clean leather trim separately.
Check that everything is dry before returning it to a drawer, travel case, or golf bag. Leave enough space that a cap isn't flattened beneath shoes and a printed shirt isn't tightly compressed around equipment.
At the Monthly Condition Check
Look at the collar, underarms, seams, and graphic edges. On hats, inspect the visor's firmness, sweatband stitching, and any cracked or peeling trim.
Use condition to decide what stays in play:
- Keep it when the shirt retains its shape and the artwork remains flexible and attached.
- Repair or ask the supplier when a seam opens or an isolated print edge begins lifting.
- Retire it from course use when the collar won't recover, the fabric becomes noticeably thin, or the graphic repeatedly splits during normal wear.
- Replace a structured hat when its visor no longer holds its intended shape after careful drying.
Don't use visible opacity as a home test of sun protection. A review of textile ultraviolet protection testing explains why stretching, wetting, aging, and laundering belong in protection assessment.
For team orders, include a simple care card with every shirt and keep a sample for comparison. Protect the print and the performance fabric together, and the shirt has a better chance of keeping its joke wearable.
Tattoo Golf offers graphic performance golf apparel and coordinating hats for players who want personality in their course kit. Visit Tattoo Golf to explore shirts for your next round or group outing, and check the care instructions before choosing your rotation.



Share:
Professional Golf Shirts with Logo: How to Choose